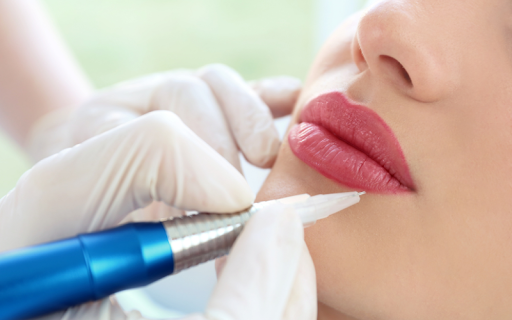
So, you’re thinking of becoming a lip tinting pro? First off-yes, let’s do this. But before you glide that PMU machine over real lips, there’s a secret to building confidence and control: practicing lip tinting on latex. It’s like your beauty bootcamp, but way more fun (and zero pressure).
This guide is your go-to for getting started: from choosing the right tools to refining your technique on latex skins. Whether you’re a PMU student, total newbie, or just starting your glam journey, let’s make this practical, creative, and genuinely confidence-building.
Why Practicing Lip Tinting on Latex Is a Total Game-Changer
Latex practice skins are your no-risk, all-reward playground. It’s where everything begins – no stress, just you, your machine, and all the space to grow.
Here’s why artists and beginners alike swear by it:
- Muscle memory matters: The more you repeat movements, the smoother and more confident your hands get.
- Test and explore: Try different needle types, shading patterns, and pigment builds.
- Design skills on point: Practice lip symmetry, shaping, and outlines until they’re second nature.
- Mistakes are part of it: On latex, you get endless do-overs-no pressure, all progress.
Most experienced artists recommend practicing on latex several times a week-it’s the fastest way to level up your technique.
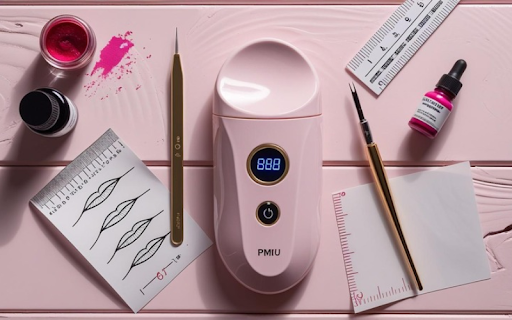
What You’ll Need Before Practicing on Latex
Setting yourself up with the right tools and environment makes practice more effective-and way more satisfying.
A basic PMU lip tinting kit helps you train safely and correctly from the start.
Best Latex Skins for Lip Practice
- Use blank sheets for freestyle drawing or tracing with stencils.
- Try pre-drawn outlines to focus on needle control and shading.
- Choose latex that feels realistic-firm, slightly flexible, and not too glossy.
- Bonus: Slip a printed lip template under clear latex to help guide your outlines.
PMU Machine & Needle Setup
- Pick a lightweight machine with adjustable voltage and low noise.
- Start with 1RL for crisp outlines, then use 3RS or 5RS for soft, even shading.
- Keep your voltage between 6.0-7.5V, depending on your hand speed.
Pigments & Other Tools
- Use practice pigments or dilute your usual pigments with distilled water.
- Have on hand: wipes, barrier film, gloves, cotton pads, and latex stands or holders.
Getting Your Latex Ready for Practice
A tidy, professional setup helps you stay focused and builds habits that will carry into your client sessions.
Step 1: Set Up Your Practice Space
- Cover your workspace with barrier film or dental bibs.
- Clean your hands and sanitize tools-even for practice.
- Use bright, direct lighting to see all the fine details clearly.
Step 2: Draw or Stencil the Lip Shape
- Use a lip ruler or pre-made stencil to sketch realistic, balanced lips.
- Draw with pencil or pre-inked markers.
- Keep your designs centered, symmetrical, and proportioned like natural lips.
A basic PMU lip tinting kit helps you train safely and correctly from the start.
Practicing Lip Tinting Techniques on Latex
Now for the hands-on part.
Begin with practicing machine control and hand movement. Try these basic techniques:
- Whip shading
- Circular shading
- Pendulum motion
Slow, steady strokes help you master pigment control and hand pressure on latex.
Keep your wrist relaxed, use your fingers to guide the motion, and avoid using your whole arm. Steady, even movements help with pigment placement and consistency.
Even though latex doesn’t stretch like real skin, try holding it taut with your non-dominant hand. This gives you better line precision and control.
When it comes to pigment layering, resist the urge to go full-coverage in one pass. Build up slowly. Start light, let each pass settle, then add depth and dimension.
Pay attention to pressure. If pigment is pooling or dragging, lighten up. Let the weight of the machine do the work. Practicing this now helps protect real skin later on.
Common Mistakes to Avoid
Even in practice, good habits matter. Watch out for these:
- Skipping warm-up lines: Start every session with a few warm-up strokes on the edge of the latex.
- Going too fast: Precision always matters more than speed.
- Wrong needles for shading: Don’t try to shade with a liner needle. Start with a round shader.
- Overworking one area: More passes won’t help. It just ruins the surface and teaches bad habits.
- Not cleaning between passes: Wipe off extra pigment to clearly see your progress.
Practicing poor technique too often can lead to bad habits later on.
Pro Tips to Level Up Your Practice
- Track your progress: Take photos of every practice session and date them.
- Use mirrors or record yourself: See your posture, angles, and hand movement in action.
- Join a PMU group or forum: Feedback helps you grow faster.
- Simulate real sessions: Set a timer, limit breaks, and stick to the same routine each time.
For more practical tips, visit this post on how to practice lip tinting on latex like a pro.
Final Thoughts: Progress Comes with Practice
Practicing lip tinting on latex isn’t just about technique-it’s where your confidence starts. It’s the safe space to grow, try new things, make mistakes, and see improvement over time.
At Vivitag, we’re here to support that growth with quality tools, honest tips, and a community of artists learning right alongside you. Explore our full collection of beginner kits, training materials, and artist resources – and keep practicing until it feels natural. You’ve got this.
FAQs – Quick Answers for New Artists
What’s the best latex skin to use?
Go for soft, thin latex with pre-drawn lips or blank, transparent sheets you can trace over.
How often should I practice?
Aim for 3 to 5 focused sessions per week. Even 30–60 minutes at a time works wonders.
Can latex practice skins be reused?
Yes, but only for a few sessions. Once the surface wears down, it won’t hold pigment well.
Should I use real pigments while practicing?
You can, but practice pigments or diluted versions help you save money while improving your technique.