Okay, confession time: the first time I tried drawing a lip shape, it looked more like a squished heart than an actual mouth. But if you’re just starting out with PMU (or even just exploring the art of lip mapping), drawing lip shape for clients can feel totally overwhelming.
So let’s break it down. In this post, I’ll walk you through how I learned to draw clean, symmetrical lips from the tools I used to the practice hacks that actually helped me improve. Whether you’re sketching for fun, practicing on latex, or preparing for real-life clients, I’ve got you.
Why Lip Shape Drawing is a Big Deal (Even If You’re Not Tattooing Yet)
Before any tint or pigment goes near a client’s face, your outline is everything. Seriously drawing a lip shape is like setting the foundation for the whole look.
Here’s why I take pre-drawing so seriously:
It helps you understand different lip shapes (we all have our own quirks!)
You can avoid uneven results later on
It makes client consultations way smoother
It’s a confidence booster when your lines just click
Plus, it’s a safe way to practice if you’re not quite ready to pick up the machine.
What You’ll Need to Start Sketching (No Fancy Kit Required)
When I first started, I pulled together a few basics and it worked just fine:
Pencil or marker
Plain paper or printable lip sheets
Optional stencils (great for getting the hang of it)
Latex skin (once you’re ready to level up)
Ruler or divider to help check proportions
If you’re more into digital drawing, you can use a tablet app to trace lip outlines. I love flipping back and forth between paper and screen, depending on my mood.
Tip: Keep all your tools together so practice feels fun, not like a chore.
Quick Lip Anatomy (Without Getting All Science-y)
You don’t need a beauty school diploma to draw lips, but a little anatomy goes a long way. Here are the features I pay attention to:
Cupid’s bow – that little “M” shape at the top
Philtrum – the two ridges leading down from your nose
Vermillion border – the natural edge of your lips
Oral commissures – where your lips end on each side
Tubercle – the subtle bump in the middle
The goal? Balance, not perfection. Faces aren’t perfectly symmetrical, and that’s okay. But with a few guide lines, you’ll get pretty darn close.
Knowing lip anatomy helps you sketch natural, even shapes with confidence.
My 5-Step Routine for Drawing Lip Shapes
Let’s be honest: you don’t need 20 steps or a ruler tattooed on your finger. This is my go-to method that keeps things simple and beginner-friendly:
Draw a vertical center line: This line keeps everything balanced. Think of it as your symmetry anchor.
Sketch the Cupid’s bow: Start with that soft “M” shape in the middle and curve gently outward.
Add the top lip line: Extend from the Cupid’s bow, curving slightly downward on each side.
Shape the bottom lip: Draw a gentle curve from corner to corner. Make it look natural and a bit fuller.
Smooth, check, and adjust: Erase guide lines, soften sharp edges, and compare both sides. Flip the image if you’re drawing digitally it really helps spot unevenness!
Visual learner? Try snapping photos of your sketch, flipping them, and zooming in. You’ll see things your eyes miss at first.
Guide lines and Cupid’s bow placement are key for symmetry and flow.
Looking for more insights? Here’s Hivivi’s detailed breakdown on how to draw the perfect lip shape.
Lip Drawing Mistakes I Totally Made (and How to Avoid Them)
You know what’s comforting? Everyone messes up at first. These were my early oops moments:
Making the lips too tiny or too wide for the face
Over-sharpening the Cupid’s bow
Rounding the bottom lip too much (hello, cartoon mouth)
Forgetting to connect corners smoothly
Skipping guidelines and “winging it” (don’t do it just don’t)
Try this: Flip your canvas or photo to spot symmetry issues. Works like magic.
Practice Tips That Actually Helped Me Improve
I wasn’t born with steady hands or an eye for spacing. Here’s what helped me level up:
Trace first, freehand later: Print out lip shapes or use a drawing app to trace over and over. It builds flow and confidence.
Study real lips: Scroll through selfies, makeup looks, and natural lip types. Notice how lips relate to the nose, chin, and cheeks.
Record and reflect: Take progress photos. Flip them. Re-draw them. Even record a timelapse of your sketch to see where your hand tends to wobble or rush.
Make it fun: Set a timer for 10-minute daily sketching sessions and see how far you go in a week!

Fixing uneven lines helps beginners grow faster and avoid bad habits.
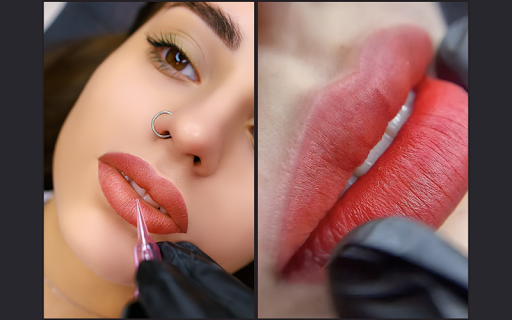
Where This Pays Off in PMU
If you’re aiming to offer lip blush, tinting, or even full lip tattooing one day, your ability to draw lip shape for a client is everything. It comes in handy when:
You’re mapping the lips pre-treatment
You’re explaining outcomes during consultations
You need to correct asymmetry from past work
You want to showcase your skills on Instagram (clean sketches = love)
Extras That Make Learning Easier
Want more ways to improve without burning out? Try these:
Watch beginner lip drawing tutorials on YouTube
Download a free printable lip grid to practice (I made one for myself DM me @vivitag if you want it!)
Compare before/after sketches as you grow
Final Thoughts: Just Keep Drawing
Here’s the truth: your first 20 lips might look wonky. Mine did too. But that’s exactly how you get better.
Every pencil stroke builds muscle memory. Every sketch builds confidence. And the more you draw, the more intuitive it becomes. So take your time, be kind to yourself, and celebrate the wins big or small.
You’re not just drawing lips. You’re creating beauty, building trust, and preparing for future clients who’ll love the care you bring to your craft.
FAQs: You Asked, I’ve Got Answers
How do I draw lips that are actually symmetrical?
Use a vertical guide and horizontal markers. Then flip the image to double-check balance.
How can I practice without wasting materials?
Start on paper or with digital tools. Then move to latex when you’re ready.
Are there tools to help beginners?
Yes! Try stencils, symmetry rulers, and printable templates.
Do different lips affect how I draw them?
Absolutely. Full lips, thin lips, or asymmetrical lips all need small adjustments. Practice with variety!
Can I use apps to practice?
Totally. Procreate and other sketching apps are perfect for tracing and experimenting.